Deploy WordPress with Redis on Railway
Tutorial deploy WordPress dengan Redis caching di Railway menggunakan environment variable WORDPRESS_CONFIG_EXTRA tanpa edit wp-config.php secara manual.

When running WordPress, performance matters. By default, WordPress stores most of its transient data and cache in the database. This works fine for smaller sites, but as your traffic grows or when you run multiple WordPress instances, database queries can become a bottleneck.
That’s where Redis comes in. Redis is an in-memory data store that can drastically speed up WordPress by caching frequently accessed data, reducing the load on the database, and improving page load times. In other words — fewer queries hitting MariaDB/MySQL, and faster responses for your visitors.
In this tutorial, we’ll walk through how to:
- Deploy WordPress and Redis on Railway
- Install and configure the Redis Object Cache plugin for WordPress
- Use the
WORDPRESS_CONFIG_EXTRAenvironment variable to connect WordPress to Redis without manually editingwp-config.php - (Optional) Expand the same setup into a multi-tenant stack with one database, one Redis cache, and multiple WordPress sites
This guide is written to be practical — we’ll start from a regular WordPress deployment, then add Redis step-by-step until everything is connected and optimized.
You can also use my prebuilt template on Railway here: https://railway.com/deploy/wordpress-with-redis
Step 1 - Use Template for Create Regular WordPress


This is the looks when the deployment has finished:

Step 2 - Configure Your WordPress
Just like regular setup, like filling out the details what kind of site of this, creating the accounts, and more.


Step 3 - Install Redis Cache Plugin
Go to Plugins → Add Plugin

Search for “Redis Object Cache” plugin, then install and Activate the plugin

As you can see, the redis is unreachable.
It’s normal because we’re not install/deploy the Redis service yet.


Step 4 - Deploy Redis Cache
Click “ + Create” button in the top right of the canvas screen

Type “Resdis”, add it, and wait for a coupule of seconds

As you can see, there are no line between WordPress and Redis.
Thats normal because we’re not setup a connection yet.

Even we’ve deployed Redis on the same project, it doesn’t automatically detected. The localhost IP address (127.0.0.1) is referred to the WordPress docker image service itself, not the Redis service.
Step 5 - Configure Environment Variables on WordPress
There are many ways to set up Redis on WordPress, such as modifying the wp-config.php file, running it locally, or even connecting via tunneling.
In this case, we’re using a simpler method by leveraging the WORDPRESS_CONFIG_EXTRA environment variable provided by WordPress itself. This variable allows us to add extra configuration to the WordPress instance, such as defining the Redis connection URL.
Click WordPress service → Go to Variables tabs → Click “New Variable”


Fill the fields:
-
VARIABLE_NAME
WORDPRESS_CONFIG_EXTRA -
VALUE:
define('DOMAIN_CURRENT_SITE','${{RAILWAY_PUBLIC_DOMAIN}}');define('WP_HOME','https://${{RAILWAY_PUBLIC_DOMAIN}}');define('WP_SITEURL','https://${{RAILWAY_PUBLIC_DOMAIN}}');define('WP_REDIS_HOST','${{Redis.RAILWAY_PRIVATE_DOMAIN}}');define('WP_REDIS_PORT',6379);define('WP_REDIS_PASSWORD','${{Redis.REDIS_PASSWORD}}');define('WP_REDIS_SCHEME','tcp');
Here if you want to see the value more pretty:
define('DOMAIN_CURRENT_SITE', '${{RAILWAY_PUBLIC_DOMAIN}}');
define('WP_HOME', 'https://${{RAILWAY_PUBLIC_DOMAIN}}');
define('WP_SITEURL', 'https://${{RAILWAY_PUBLIC_DOMAIN}}');

define('WP_REDIS_HOST', '${{Redis.RAILWAY_PRIVATE_DOMAIN}}');
define('WP_REDIS_PORT', 6379);
define('WP_REDIS_PASSWORD', '${{Redis.REDIS_PASSWORD}}');
define('WP_REDIS_SCHEME', 'tcp');
Add and save it


Now all of them are connected, we can observe by detecting there lines between them.

At this time, the WordPress service is expected to able detect the Redis service within the project.
To make it sure, go back to the Redis Object Cache plugin page and refresh it regularly.

And yes, it now reachable. It utitlizing a Railway internal networking to connect between services. We can notice the redis.railway.internal on the WP_REDIS_HOST environment variable.

Step 6 - Enable Redis Object Cache
Last but not least, enable the caching functionality


And that’s it ! Your WordPress site is now supercharged with Redis caching, running smoothly on Railway. 🚀
With this setup, you’re already getting a noticeable performance boost, especially for sites with a lot of dynamic content. And the best part? You did it all without touching wp-config.php manually, thanks to WORDPRESS_CONFIG_EXTRA.
Of course, this is just the beginning. You can expand this stack to power multiple sites, experiment with different caching strategies, or even integrate more services into your Railway project.
Hope this guide helps you speed up your WordPress. And if it does, maybe treat yourself to a good coffee while watching your site load faster than ever. ☕✨
Tip (Optional): With this stack, you can also build a multi-tenant architecture. For example, using a single database server (MariaDB/MySQL), a single caching layer (Redis), and multiple WordPress instances, such as 3 or 5 websites running simultaneously. For now, though, we’ll stop here.

Personal notes, technical guides, and reflections on technology, automation, and everyday life.
Continue reading
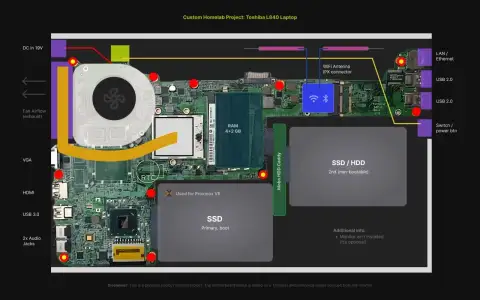
💻 Laptop Bekas Jadi Home Server Proxmox.
Mengubah laptop bekas yang rusak fisik menjadi home server dengan Proxmox untuk eksperimen virtualisasi, Docker apps, dan belajar jaringan secara mandiri.
Pengalaman Hackathon Railway
Mengikuti hackathon Railway dengan template WordPress + MariaDB + Redis: meraih honorable mention dan kredit $25, serta pelajaran tentang dimensi teknis dan etis.
☔ Setup Personal Mini Server dengan Coolify
Panduan membangun personal mini server di AWS Lightsail dengan Coolify lengkap dengan integrasi Cloudflare, R2, dan Resend untuk otomasi dan blogging.